Monday, February 28, 2011

Assorted Plaques


We had these plaques at the shop,  they were so close to the back door is wasn't funny.  Meaning they were on their way out to the thrift store.  The "Cat" was back and asked if there was anything I might be able to do with them so that we would be able to make some money off of them......WELL I quickly remembered The Graphics Fairy and all of her, graphics.


I had been saving my favorites and this just might be a good time to use them.  I don't have a before picture, seems like I am always in such a hurry to start the project that the camera is the last thing I think to grab.  They were basic 8 x 10 pieces of MDF I believe with pictures that had been glued to the front.  There was a bit of a bevel on the edges and they were nothing special. 

I sanded down the picture so my paint would stick. Then I painted them with a coat of tan I had on hand.  When that was dry I used some off white and dry brushed on top of the tan.  Then got out the Mod Podge and went to work adding the graphics. 

Some of the pages wrinkled a bit some did not.  I have no idea why, I was concerned with the wrinkles, turns out they made the outcome better.  Who would have thought.  After that was dry I took the little hand sander out and sanded the edges and over the tops of the graphics.  It cut into the paper a bit especially where the wrinkles were.  After that I put a brown glaze over the top of that to age them a bit.


  Our decorator, Caroline was in love with them and could not wait to put them throughout the store. 


 If you are ever in the Atlanta area please stop by the shop.
Treasures Resale Consignment shop
Roswell, GA 

 The Graphics Fairy

Wednesday, February 23, 2011

Elegant Mirror


Hello Ladies.  Today I have an elegant mirror that I am doing for a client.  She bought it at our shop and wanted it Redesigned so to speak.   Here is the before......


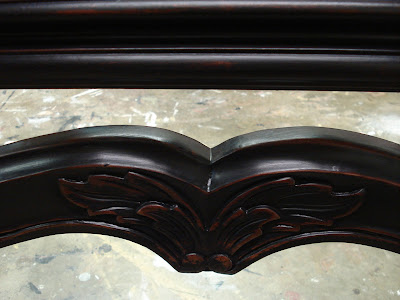
 It was pretty, but dated.  And HUGE did I mention how huge it was!  Like 6 feet tall huge.   I painted it black and distressed it.


I didn't distress it so that the raw wood was exposed just enough to get the black off down to the stained wood.  I used a clear paste wax after the distressing, which made it look very rich looking.  I  do apologize for the really poor pictures, I took them in the shop which is REALLY cluttered.  May I also say that mirrors are really
hard to take photos of. 


Hope you like the project.  The client was thrilled, which is all I can hope for.

Thanks for stopping I really appreciate it.


Connie


Transformation Thursday
Furniture Feature Fridays
Photobucket

Thursday, February 17, 2011

Cat and Mouse Part 3 The Bed!


Sheesh this just goes on and on, she was only gone a week!   Apparently I did a lot of painting while "the Cat was away!"  Anyhow, here is the bed that I promised yesterday.  Just as a refresher I used the paint technique from Savvy Southern Style found here.


This is the bed before I did anything.  It was a bit different from the previous post pieces that I did, as this one had paint on it already.  Oil based paint someone had tried to get off and gave up.  Then they "donated" it to us.  Thanks, I have to love those people!  I do admit it sat in the warehouse for a few many many months, no one seemed to know what to do with it.  Not wanting to mess with taking the paint off,  I tend to want to take the easy way out.  This paint technique I wanted to try,  I thought might work.  Just paint the colors over what was already there and be done with it!  As you can see it was very chippy as well, I thought that might work to my advantage.  I painted it our white "Sherwin Williams Crisp Linen" over everything, then some green and then some blue here and there.  Visit the Savvy Southern Style site mentioned above she gives more detailed instructions. 


Here is an area of the bed after the painting and then the distressing.  I sanded (using 80 grit paper cause this technique looks best when its pretty scratchy looking) but only to the old paint which is the yellow that you are seeing.  Where it shows bare wood it was already bare wood when I started.


This is a close up of the headboard finished.  After I distressed I put a dark glaze over everything, which worked great in all the chippy parts and areas.  It really is SHABBY looking though.  I was not sure how long this would stay on the floor for sale.  I believed it would take just the right person to want this.


Here it is all fluffed out in the store.  Keep in mind our decorator uses just what we have in the store to make things work.  She does amazing things,  things we would never think of ourselves.  But it seems to work.  In that plate rack to the left of the bed on the wall, are bundles of books I was inspired to make after looking at a few  peoples blogs.  (big smile here  I get so inspired my head is usually spinning with ideas.)

Apparently the painting method is a hit, the bed was on the floor exactly 24 hours and someone bought it. Bedding, mattress and all!! 

Thanks for stopping by, Please leave a comment I so enjoying hearing what everyone has to say.

Connie

Photobucket

Wednesday, February 16, 2011

When the Cats away The Mouse will Play Part 2

 This little chest came in while the Cat was away, she never even saw it.  It had been  donated one morning just before I arrived.  I decided it needed to be painted and took it home. Pronto!!

  
I also found this empty frame. We like to have a few pieces that look somewhat the same to put together on the floor. It went home as well.


That little plate on the side came off and I filled the holes with wood putty.  Had the mister cut a piece of wood for the back and painted that with Chalk board paint.


 Here is the companion mirror that came home with me from a previous post.

Using a painting technique I found at one of my most favorite blogs "Savvy Southern Style" check it out here .  I went ahead and tried the technique.  It turned out amazing, I was so happy with it.... see for yourself.


The mirror really shows the off white, blue and green that went into the painting of the pieces. I distressed them quite heavily, then glazed them.


Then for the icing on the cake.  The little chest sold with in 3 hours of it going on the floor.  Actually it was just sitting on the floor nothing had been displayed with it to make it look all pretty.  Hence the picture above with the chalk board just sitting on it.  I at least wanted a picture before he took it away!!


Our decorator then proceeded to put the bed I had painted in the same technique where she was going to put the chest. 

 Come back tomorrow for the post about the bed.


Monday, February 14, 2011

The Table had no Leaves!!


I have spent many hours on the internet looking at peoples blogs and was once again inspired.


 I have to give credit to Miss Mustard Seed for inspiring me once again.  Please check here for her wonderful blog about signs.


Being that the cat was still away I (the mouse) found these old table leaves in the back of the warehouse.  They were so old they didn't have any finish on them to speak of no wax, no varnish nothing.  Made it very easy to use them with out much if any prep. 


I did cut off the little pegs that make the leaves fit together when in the table I didn't think we needed those on the piece.  I did not however fill the holes that said pegs would fit into.  Left those so people would know it was a reclaimed piece.  I painted it off white.  What  we use at the shop for all of our white is Sherwin Williams Crisp Linen.  Then I found the wording I wanted on line, and the font I wanted in Print Shop.  After a few tries I got the words to fit the board size.  Printed that sucker out and pasted the pages (3) together then transferred the letters to the board and painted the letters with Black Bean from Behr.


 After that was done I distressed the sign with sand paper right over the words and the white paint.  Next step was the glaze.  Dark brown wiped that off and the sign was done. 


It is hanging in the shop now!  If you are in the area please stop in and visit.

Treasures Resale Consignment Shop
11060 Alpharetta Highway #140
Roswell, GA 30076-1466
(770) 594-2939

Saturday, February 12, 2011

When the Cat is away the Mouse will Play

Hi everyone,  I must say I have been enjoying everyone's blogs and am so inspired.

Lets say the Cat was away from the shop and the mouse was playing left on my own to find something to paint. (The Cat being the manager of our shop, poor thing was out for a week with the flu.) The mouse (that would be me) found two old mirrors that came in with a dresser.  The dresser was painted and went out the door but the mirrors sadly were left behind, and were pushed further and further into the background of the warehouse.  I found them and wanted to try a new technique that I had seen here.  Miss Mustard Seed, let me just say I am in love with the things she does!


So back to my project I purchased little sample pots of the colors she used, Georgian Revivial Blue by Sherwin Williams and  Light French Grey by Behr and I went to work.  This is the transformation of one of the mirrors.


 Here is the before of the mirror, not much to look at except all the things reflected in our shop. Sorry I will have to work on the taking of pictures.  More on that later.


 I painted the darker turquoise then painted the lighter french blue on in streaks and blotches.  Sorry no pictures of this step again (picture taking 101, I apparently skipped that class)


I then sanded with 80 grit sand paper, and glazed the piece. I took this picture after it was hung in the shop and all you see is the ceiling of the shop.  Sorry, but the mirror frame looks amazing.  ;)


I was SO happy with the way it turned out.  I mean really excited.  I love the colors but have to admit the middle stage where it was just the two colors was a bit off putting to say the least.  I guess you could say that was the ugly stage.  I use that term in my decorative painting as well,  that middle stage you just have to trust me that it will turn out, cause by looking at it one might wonder what I was doing.


I am excited to try this on a bigger piece maybe a chest of drawers if one comes in to the shop.

Stay tuned for more of my projects from "When the cat was away the mouse will play"


Friday, February 4, 2011

Miss January

Here is my project for the month of January. 


She was pretty, but very old for sure.  She needed a lot of work the slats that let the drawers slide were damaged or dangling.  Mr. Sensible-Redesign fixed those for me and helped me sand the top.


 This is a photo of the detail on the piece.  It had lots of potential.


 A bit of damage here on the side, but I believe those are beauty marks and usually leave those.


 The top was pretty so I wanted to leave it natural, something I have not done in the past.  It took lots of sanding because there was poly on the top of the piece.  We sanded it all down and put a stain on it then a wipe on Poly.
 I painted it an oops color from Home Depots sample section, 50 cents  Woo  Hoo!  It's a grey / green there was no name on the color probably a custom match that didn't match... It worked well for me. 


 I distressed by sanding the edges and where it might get worn.  Hit the high spots on the details, and where the handles were.  Then mixed a brown glaze and wiped that on.


 The handles were all there and in really good condition.  So nothing needed to be done to those. 

 The finished Miss January. 
She is for sale at Treasures Resale Furniture Consignment Store, Roswell Ga.
Please stop by if you are in the Atlanta area and give her a look. 

Popular Posts